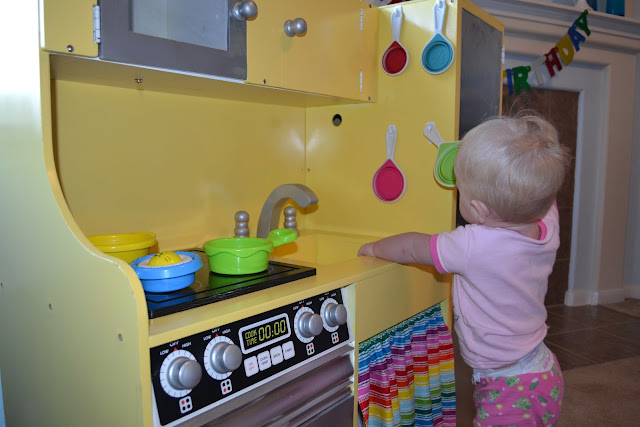
For Georgia's first birthday I knew I wanted to get her a play kitchen. But, I didn't really want to get her a play kitchen as much as I wanted to make her one. I ended up buying a used one online and it was in REALLY bad shape.
I took several before pictures but they are no where to be found.
{Melissa and Doug - 20$ online}
This is pretty much what we were working with. BUT, ours had no bottom fridge door and no oven door so we got creative!
We turned the top fridge door on it's side, painted it silver, and used it for the oven (with a piece of molding above it to fill in the gap it left.)
Then, we use a spare board to create an all new fridge door.
I used leftover material from my classroom to sew a skirt for the under sink area. It actually works with the measuring cups and pot and pans though which was unplanned.
Obviously you can tell I painted every surface of her kitchen and it took A LOT of spray paint to cover up that blue! Also, I used Krylon spray paint and will NEVER buy it again. It was like painting with water. All the silver was Rustoleum and it worked great! Also, the kitchen was particle board and not made well to begin with. If we had it to do all over again we would have built it from a nightstand or end table. The route we took was VERY difficult.
We already had the pots and pans. The apron on the side is from an antique store and the measuring cups were a wedding gift that I never took out of the package until Georgia was born and only then, I opened them to give to her.
Oh, and the knob on the fridge is an antique glass knob because you know what...at midnight it was the only thing we could find in the house that would work. (I bought 20 of them online several years ago and this one was left over.) The only things we ended up buying for this project were the kitchen itself and several cans of spray paint. Everything else we already had on hand.
Sorry, I don't have good pictures of it. It is actually now back in the garage since our house has been showing. A bright yellow kitchen in the living room doesn't appeal to all ;)
Jonathan took the entire thing apart and I spent a lot of time spray painting the whole thing. Slowly. Layer by layer. Every.single.knob. I may have a few hard feelings towards this kitchen.
Then, Jonathan spent a good amount of time putting it all back together and carrying it into the house all while the Peach slept so it would be in the living room for her by morning.
It was a labor of love for sure. I can't wait until we have a playroom to put it in!


4 comments:
Oh I just love it!!! Y'all did an amazing job!!!
I've been keeping my eyes out for one! I know we don't "need" it yet but I just know when I'm looking for something it can take a while to find it!
love it! I've actually been researching kitchen's for H's birthday too! you did such a good job!
I definitely love all the DIY kitchens I've seen over the store bought ones so good job! I hear you on the painting headache - we went about doing the stripes on Liam's chairs the wrong way and it got SO frustrating. I think we used Krylon too and had to spray layer after layer. Ugh!
It turned out really cute though! I love the bright, cheery colors!
It turned out so good! The DIY play kitchens are always so much cuter than store-bought ones. :-)
Post a Comment